
Section 1: Dosage Calculation
Fumigation efficacy depends entirely on delivering the correct quantity of gas to achieve lethal concentrations throughout the structure for a sufficient period of time. Too little gas and the concentration will be insufficient to kill all pests, particularly in dense wood where penetration is slower. Too much gas wastes fumigant, extends clearance time, and increases the volume of greenhouse gas released into the atmosphere. Accurate dosage calculation is a core technical skill for every Category 7 certified operator.
The Concentration-Time (CT) Factor
The effectiveness of a gaseous fumigant is not determined by concentration alone, nor by time alone — it is determined by the product of concentration and time, called the CT factor. The CT factor is expressed in units of ounce-hours per 1,000 cubic feet (oz·h/MCF) for sulfuryl fluoride dosage calculations. The Vikane product label specifies minimum CT factors for different target pest species at different temperature ranges.
For Western Drywood Termites and most wood-destroying beetle species, the Vikane label requires minimum CT factors that vary with temperature:
| Wood Temperature | Minimum CT Factor (oz·h/MCF) | Typical Exposure Time |
|---|---|---|
| Above 80°F (27°C) | 16 oz·h/MCF | 16–24 hours |
| 70–80°F (21–27°C) | 24 oz·h/MCF | 24–36 hours |
| 60–70°F (16–21°C) | 35 oz·h/MCF | 36–48 hours |
| Below 60°F (16°C) | 48 oz·h/MCF | 48+ hours |
Florida's warm climate is a significant operational advantage: structures fumigated at wood temperatures above 80°F — which is typical for Florida from late spring through fall — require the lowest CT factors and shortest exposure times. A structure fumigated in January in North Florida where wood temperatures have dropped into the low 60s requires more than twice the CT factor of the same structure fumigated in August.
The temperature used to determine the required CT factor is the wood temperature — not the air temperature inside the tent. Wood temperature lags air temperature. On a hot Florida summer day, the air inside a tent may be well above 90°F, but thick structural wood (4×4 posts, built-up beams) may still be in the low 70s if the structure was cool overnight. Use a calibrated thermometer (infrared or contact type) to measure actual wood surface temperatures at multiple points in the structure when determining the appropriate CT factor to apply.
Volume Calculation
Dosage is calculated based on the total gross volume of the structure to be treated, expressed in thousands of cubic feet (MCF). The gross volume includes all interior spaces — living areas, attic, crawlspace, attached garage — that are enclosed within the tent. Volume is calculated from exterior dimensions (length × width × height), and the total is divided by 1,000 to express it in MCF.
For structures with irregular shapes, complex rooflines, or vaulted ceilings, the volume calculation requires breaking the structure into geometric components and summing the volumes. The Vikane label and manufacturer training materials provide worked examples of volume calculations for common residential structure configurations.
Once the volume is calculated, the required gas quantity is determined from the label's dosage tables, which express the required dosage in ounces of Vikane per MCF of structure volume at the applicable temperature range. The total ounces required divided by the number of ounces per pound (16) gives the total pounds of Vikane to be introduced.
Example Dosage Calculation
A single-family home with a total gross volume of 18,000 cubic feet (18 MCF) is being fumigated in August when wood temperatures are 82°F:
- CT factor required at above 80°F: 16 oz·h/MCF
- Planned exposure time: 20 hours
- Required initial concentration: 16 oz·h/MCF ÷ 20 hours = 0.8 oz/MCF
- Total Vikane required: 0.8 oz/MCF × 18 MCF = 14.4 oz
- In pounds: 14.4 oz ÷ 16 oz/lb = 0.9 lb (approximately 400 grams)
In practice, applicators use the label dosage tables rather than deriving dosages from first principles, and they apply the standard label rate for the applicable temperature range. The example above is simplified — actual label calculations factor in half-time readings and adjustments discussed in Section 2.
An older practice — and a still-common mistake — is to round the calculated dosage up by 10 to 20 percent as an informal safety margin. Do not do this. The label-required dosage calculators developed by Douglas Products and Ensystex II already include a safety factor in the recommended CT for each combination of temperature, exposure period, and target pest. Adding extra gas on top is wasteful, environmentally unjustified, and not protective — it does not improve kill, but it does extend aeration time, increase chemical exposure to the crew, and raise the chance of a clearance failure that delays customer re-entry. Calculate the dosage per the current label calculator, introduce that quantity, and trust the label.
Section 2: Fumigant Introduction and Concentration Monitoring
Introducing Sulfuryl Fluoride
Once the structure is fully tented, all warning signs and lock boxes are in place, chloropicrin has been applied, and the dosage calculation is complete, the fumigant introduction phase begins. Vikane is introduced through a valve and applicator hose connected to the gas cylinder. The cylinder valve is opened and gas is released into the structure through one or more application points at or near the base of the tent — close to floor level — where it can distribute upward through the structure by diffusion and convective mixing.
The certified operator records the weight of the Vikane cylinder before introduction (using a calibrated cylinder scale) and after introduction is complete. The difference in weight is the quantity of gas introduced, expressed in pounds. This cylinder weight data — pre- and post-introduction — is recorded on the dosage log as documentation of the actual quantity of fumigant applied.
Gas introduction typically takes 30 to 90 minutes depending on the volume of the structure and the flow rate of the applicator equipment. During introduction, no crew members may be inside the tented structure without SCBA. The crew monitors the gas introduction process from outside the tent.
The Half-Time Reading
A key quality-control step in a properly conducted fumigation is the half-time reading — a concentration measurement taken at the halfway point of the planned exposure period. The half-time reading serves two purposes:
- It confirms that the target concentration is being maintained within the structure (the gas is not leaking out faster than expected)
- It allows the applicator to determine whether the cumulative CT factor is on track to meet the minimum required value
If the half-time reading is below the expected concentration, the remaining CT factor calculation will fall short of the required minimum. The applicator has two options: add additional fumigant to bring the concentration back up to the target level, or extend the exposure time to compensate for the lower-than-expected concentration. The Vikane label provides guidance on how to handle below-target half-time readings.
If the half-time reading shows a concentration much lower than expected — suggesting a significant tent leak — the fumigation must be paused, the leak identified and corrected, and the dosage recalculated before proceeding.
Concentration Monitoring Tools
Drager Colorimetric Tubes
Drager colorimetric tubes (also sold under other brand names as stain tubes or detector tubes) are single-use gas detection tubes that provide a direct-reading concentration measurement. A measured volume of air is drawn through the tube with a bellows pump; the tube contains a chemical reagent that reacts with the target gas and produces a color change proportional to the concentration. The concentration is read directly from the graduated scale printed on the tube.
Drager tubes for sulfuryl fluoride provide readings in ppm and are available in different measurement ranges (low range for clearance testing, high range for monitoring during the exposure period). Tubes must be used before their expiration date and stored per the manufacturer's requirements — expired tubes may give falsely low readings.
Electronic Fumigation Monitor (Fumiscope)
The Fumiscope (and equivalent electronic gas monitors) provides continuous or periodic concentration readings using a heated detector that measures the thermal conductivity or infrared absorption of the fumigant gas in an air sample. Electronic monitors are faster and more convenient for multiple-reading monitoring programs than single-use colorimetric tubes, and they can provide continuous logging of concentration over time. They require calibration with a certified reference gas mixture and must be maintained per the manufacturer's schedule.
Many experienced fumigation operators use both tools — the electronic monitor for the half-time reading and ongoing monitoring during the exposure period, and Drager tubes for the final clearance readings where documented, direct-reading measurements are most important for the clearance certificate.
Concentration monitoring must occur at multiple points within the structure — not just at one convenient location near the gas introduction point. At minimum, monitoring should include the lowest point of the structure (crawlspace or slab level, where the heavy gas accumulates), the highest point (attic or upper floor), and representative living areas. A concentration that meets the target in the living room but is below minimum in the attic means pests in the attic framing will not be killed. Document the location of each monitoring point on the monitoring log by room and height.
Minimum Concentration Requirements
The Vikane label specifies minimum concentrations (in ounces per thousand cubic feet, or equivalent ppm readings) that must be maintained at each monitoring point throughout the exposure period for the CT factor to be valid. The minimum concentration at the lowest monitoring point (ground or slab level, where dilution by settling of the heavier-than-air gas is greatest) must be met at all monitoring points — if any single point falls below the minimum, the CT calculation for that point is compromised.
At the end of the exposure period, a final end-of-exposure reading is taken at all monitoring points and recorded on the dosage log. These readings, combined with the half-time readings and introduction time, allow calculation of the actual CT achieved at each point. The actual CT at every monitoring point must equal or exceed the label-required minimum CT for the applicable temperature and target pest before aeration begins.
Section 3: Aeration Procedures
Aeration is the process of removing fumigant gas from the structure after the required exposure period is complete. Proper aeration is as important as proper dosing — a structure that has not been adequately aerated will have residual fumigant concentrations that could injure or kill re-entering occupants.
Initiating Aeration
Aeration begins by opening the tent to allow gas to escape. This is done in a controlled sequence:
- Crew members wearing SCBA remove the tent from the uppermost portion of the structure first — starting at the ridge or peak — to allow the heaviest initial gas load to escape from the top of the tent as the tent is pulled back
- Ground snakes are pulled back and the tent skirt is raised at ground level to allow air flow under the tent
- Tarps are progressively removed from the structure, with crew members working from the perimeter toward the center
- All exterior doors and windows are opened as the tent is removed to allow through-ventilation
- HVAC systems are NOT turned on during initial aeration — they will be turned on after the initial passive aeration period to assist with final clearing
Crew members must wear SCBA during the initial tent opening and the first phase of aeration. As the gas level drops and the structure is open and ventilating, SCBA may be replaced with an air-purifying respirator once confirmed readings show concentrations are below the SCBA/SAR threshold — but the certified operator must make this determination based on instrument readings, not estimation.
Active Ventilation
After the tent has been removed and the structure is open on all sides, active ventilation is used to accelerate clearance. Box fans or blower fans placed in doorways and windows create positive pressure on one side of the structure and negative pressure on the other, forcing air circulation through the interior. The HVAC system can be turned on to circulate air through the ductwork — this assists in clearing fumigant from areas of the structure with limited natural air exchange (interior closets, small rooms, attic).
The Vikane label (EPA Reg. No. 1015-78, current specimen label revised 07/08/2024) specifies two aeration procedures based on the initial concentration of fumigant introduced. The applicable procedure is determined by the introduction rate in ounces per thousand cubic feet (oz/MCF):
Aeration Procedure 1 — Required for Initial Concentrations ≤ 16 oz/MCF
The vast majority of residential drywood termite fumigations fall under Procedure 1 (typical introduction rates are well below 16 oz/MCF). Procedure 1 has three sequential steps:
- Step 1 — Active aeration: Open all operable windows and doors. Run at least one 18-inch-diameter fan for every 22,500 cubic feet of fumigated space. Open the door between the structure and any attached garage. Turn on the HVAC fan/blower (fan only — not heating or cooling). Active aeration must continue for a minimum of 2 hours. Removal of chloropicrin evaporation containers from the structure during Step 1 aids dissipation of the warning agent.
- Step 2 — Secured waiting period: Secure the structure and do not allow re-entry for a minimum of 12 hours from the start of aeration (first opening of the seal). The 12 hours is measured from the start of Step 1, not from the end of it. Warning signs must remain posted throughout this period.
- Step 3 — Clearance testing: After the minimum 12-hour waiting period, measure sulfuryl fluoride concentration in the breathing zone of every room with an EPA-tested clearance device. If any reading exceeds 1 ppm, ventilate further and re-test. Re-occupancy is authorized only when every monitoring point reads 1 ppm or less.
Aeration Procedure 2 — Required for Initial Concentrations > 16 oz/MCF
Higher-dose fumigations (heavy infestations, certain commodities, or specialized applications) require longer minimum aeration times. The Vikane label Table 1 specifies the minimum aeration time from start of aeration based on initial concentration:
| Initial Concentration (oz/MCF) | Minimum Hours of Aeration |
|---|---|
| Greater than 16 to 32 | 14 |
| Greater than 32 to 48 | 16 |
| Greater than 48 to 64 | 18 |
| Greater than 64 to 96 | 20 |
| Greater than 96 to 112 | 22 |
| Greater than 112 | 24 |
Cold-weather note: if the high ambient temperature during the aeration period is below 40°F at the fumigation site, a minimum of 24 hours of aeration is required regardless of which procedure applies.
The active-aeration Step 1 (2-hour minimum) and Step 3 (clearance testing at 1 ppm) requirements apply identically to Procedure 2. Only the Step 2 waiting period varies.
The aeration process is not complete simply because the minimum time has passed; it is complete when clearance testing with an EPA-tested clearance device confirms that every breathing-zone monitoring point reads 1 ppm or less.
Clearance Testing
Clearance testing is the final, legally and professionally critical step of every fumigation. The certified operator must take concentration measurements at all required monitoring points within the structure and confirm that the fumigant concentration at every point meets the re-entry standard before any occupant is allowed to return. No occupant may re-enter the structure until the certified operator has formally cleared it.
The Re-Entry Standard: 1 ppm
The Vikane product label and EPA regulations establish a clearance standard of 1 part per million (ppm) or below at all monitoring points within the structure before occupants may re-enter. This standard is based on health-protective calculations ensuring that residual fumigant at the clearance level poses no acute health risk to returning occupants, including children and sensitive individuals.
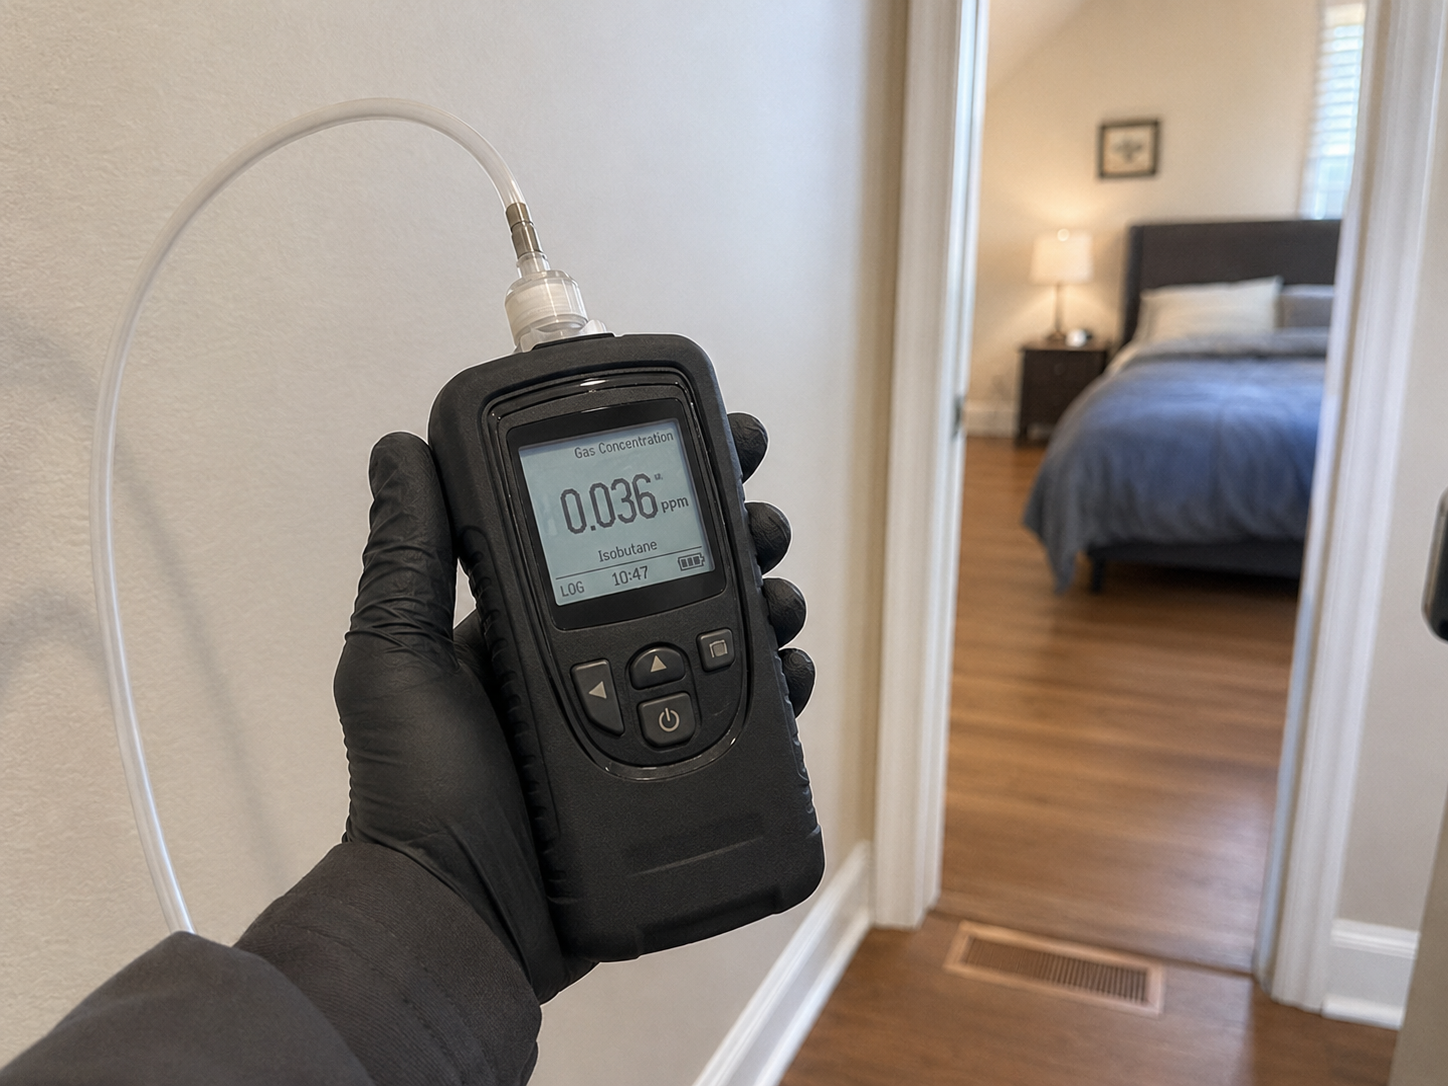
Clearance measurements must be taken using an approved and calibrated monitoring device. For re-entry clearance documentation, Drager colorimetric tubes are widely used because they provide a direct, documented reading on a physical tube that can be retained with the job file as evidence of the clearance reading. Electronic monitors may also be used if they are calibrated and if the reading can be documented.
The 1 ppm clearance standard is not a target to aim for — it is a threshold that must be met at every monitoring point before any occupant enters the structure. A structure that measures 0.8 ppm in three rooms and 2.5 ppm in the attic or a closet is not cleared for re-entry. Every point must be below 1 ppm. If any point exceeds 1 ppm, additional ventilation is required and clearance must be retested. Allowing occupants to re-enter a structure with any monitoring point above 1 ppm is a federal FIFRA violation and a Florida Chapter 482 violation — and it creates direct liability for any adverse health outcome.
Clearance Documentation — The Certificate of Re-Entry
When all monitoring points confirm concentrations at or below 1 ppm, the certified operator signs a Certificate of Re-Entry (also called a Certificate of Clearance) that:
- Identifies the property address and date of clearance testing
- Lists each monitoring point and the concentration reading at that point
- States that all points met the 1 ppm or below re-entry standard
- Bears the signature and license number of the certified operator who performed the clearance testing
- Specifies the date and time that the structure was declared safe for re-entry
The original Certificate of Re-Entry is provided to the property owner or occupant. A copy is retained in the company's fumigation file for the structure, with the dosage log, monitoring log, and all other job records, for a minimum of four years.
Section 4: What to Do When Problems Arise
Even well-prepared fumigations occasionally encounter unexpected conditions. Knowing how to recognize and respond to common problems is part of professional competence — and can prevent a minor problem from becoming a safety incident or legal liability.
Low Half-Time Reading (Possible Tent Leak)
If the half-time reading is significantly below the target concentration (typically less than 50% of the expected value), a tent leak is the most likely cause. The response procedure is:
- Inspect the tent perimeter from outside — walk around the entire tent looking for gaps at ground snakes, tears in the tarp, unsealed connections between tarp sections, and areas where the tent may have pulled away from the structure at eaves or protrusions
- Correct any identified gaps with patches and fumigation tape
- Add fumigant to compensate for the concentration that has been lost, using the recalculated dosage
- Extend the exposure time to ensure the CT factor will be met with the corrected concentration
- Document all adjustments on the dosage log, including the reason for the adjustment
Clearance Testing Failure
If clearance testing after the standard aeration period shows any monitoring point above 1 ppm, the response is straightforward: continue aeration. Open additional windows and doors if any remain closed, increase fan ventilation, and allow additional time for passive diffusion. The structure may not be entered by unprotected persons until clearance testing confirms all points at or below 1 ppm.
There is no shortcut or administrative bypass for a failed clearance. The only path to re-entry authorization is achieving the 1 ppm standard at all points. If a structure has been adequately aerated for 12 or more hours and one or more points remain persistently above 1 ppm, this may indicate fumigant absorption into unusual materials (some foams, certain adhesives, or large quantities of dense wood) that are off-gassing slowly. Extended aeration and re-testing is required.
Unauthorized Entry During Fumigation
If an unauthorized person is found to have entered or is attempting to enter the tented structure during fumigation:
- Do not allow entry without SCBA protection
- If a person is found inside and is incapacitated, immediately call 911 — this is a medical emergency. Do not enter without SCBA to attempt rescue
- If a person is found at the entry point attempting to enter, prevent entry and explain the hazard clearly
- Document the incident in writing immediately, including the date and time, the identity of the individual (if known), and the actions taken
- Notify FDACS of any unauthorized entry incident that resulted in potential exposure — this is a regulatory reporting obligation
Post-Fumigation Customer Instructions
At the time of re-entry, the certified operator or company representative should brief the returning customer on:
- The clearance readings and what they mean — reassurance that the structure has been tested and confirmed safe
- Ventilating the structure for an additional 30–60 minutes after re-entry before occupying it for extended periods, as a conservative additional precaution
- The no-residual reminder — now that the fumigation is complete, there is no ongoing protection; new drywood termite alates can re-infest the structure
- What to watch for that indicates possible new infestation (fecal pellets, kick holes, swarmers at windows)
- Warranty or guarantee terms — exactly when the guarantee period begins and how to contact the company if reinfestation is suspected
- Any items that were not accessible during fumigation (sealed crawlspace sections, locked closets, items in sealed containers) should be noted and the customer advised that those areas were not treated
Section 5: Fumigant Exposure — Health Effects and Emergency Response
Every fumigation professional must understand the acute health effects of sulfuryl fluoride exposure and be prepared to respond to a fumigant exposure event. While proper procedures prevent virtually all exposure incidents, equipment failures, unexpected occupant returns, and other emergency events can occur. Preparedness saves lives.
Sulfuryl Fluoride Exposure Standards
| Standard | Value | Meaning |
|---|---|---|
| OSHA PEL (8-hr TWA) | 5 ppm | Maximum 8-hour workplace exposure (no SCBA required below this with APR) |
| OSHA STEL | 10 ppm | Maximum 15-minute short-term exposure |
| IDLH (Immediately Dangerous to Life or Health) | 200 ppm | SCBA required; air-purifying respirator not adequate at this level |
| Re-entry standard | 1 ppm or below | Clearance level required before unprotected persons may re-enter |
| Operating concentration during fumigation | Hundreds to thousands of ppm | Lethal to pests; lethal to humans without SCBA |
Symptoms of Sulfuryl Fluoride Exposure
The symptoms of sulfuryl fluoride exposure vary with concentration and duration:
- Low-level chronic exposure (above PEL but below IDLH): Headache, dizziness, nausea, irritation of the eyes and respiratory tract, weakness
- Moderate acute exposure: Severe respiratory irritation, pulmonary edema (fluid in the lungs), coughing, chest tightness, confusion
- High acute exposure (IDLH and above): Rapid incapacitation, seizures, loss of consciousness, cardiac arrest, death
Because sulfuryl fluoride has no odor, a person exposed to moderate or high concentrations may not realize they are being poisoned until they experience incapacitation. This is why the buddy system and SCBA requirements are so important — a crew member who enters a fumigated structure with inadequate respiratory protection may become incapacitated before they can self-rescue.
Emergency Response to Fumigant Exposure
If a person is found incapacitated or in respiratory distress inside or near a fumigated structure:
- Call 911 immediately — time is critical in fumigant exposure events
- Do not enter the structure without SCBA — a would-be rescuer without SCBA will also become a victim
- If the person is outside the structure and is conscious and ambulatory, move them upwind away from the tent and structure
- If SCBA is available and the crew is trained in emergency rescue procedures, a two-person rescue team (both in SCBA) may enter to recover an incapacitated person
- Inform arriving emergency medical technicians and fire department personnel of the specific fumigant in use (sulfuryl fluoride), the approximate concentration inside the structure, and the location of the person in distress
- Provide the fumigant Safety Data Sheet (SDS) to emergency responders — keep a copy of the Vikane SDS in the company vehicle at all times
- Notify FDACS of the incident as required by Florida law
The Poison Control Center hotline — 1-800-222-1222 — is available 24 hours a day, 7 days a week. For fumigant exposure events, calling Poison Control simultaneously with 911 provides immediate access to toxicological expertise that can guide first aid and treatment decisions while emergency services are en route. Program this number into every company vehicle and every crew member's phone.
- Pre-fumigation: all safety and preparation steps from Lesson 3 complete and documented
- Dosage calculation: volume measured, temperature determined, CT factor identified, gas quantity calculated, worksheet signed
- Structure verified evacuated, tented, and sealed — warning signs and lock boxes in place
- Chloropicrin applied at label rate — crew in SCBA
- Sulfuryl fluoride introduced — cylinder pre-weight recorded; introduction rate monitored
- Cylinder post-weight recorded — actual gas introduced documented
- Half-time reading taken at all monitoring points — concentrations logged by time and location
- Half-time CT calculation confirms on track for minimum CT factor; add gas or extend time if below target
- End-of-exposure reading taken at all monitoring points — actual CT calculated and confirmed ≥ label minimum CT
- Aeration initiated — crew in SCBA; tent removed in controlled sequence
- Active ventilation with fans; HVAC on after initial passive aeration period
- Clearance testing performed — all monitoring points tested, concentrations logged
- All points confirmed ≤ 1 ppm — Certificate of Re-Entry signed by certified operator
- Occupant briefed and provided copy of Certificate of Re-Entry
- Complete job file assembled: contract, checklist, dosage log, monitoring log, clearance certificate, cylinder weight records
- Records filed for minimum 4-year retention
You've completed all four lessons of this course. Revisiting the objectives from the start, you should now be able to:
- Apply Florida's fumigation licensing, contract, notice, and recordkeeping requirements under Chapter 482.
- Explain sulfuryl fluoride chemistry and identify the target pests that fumigation controls.
- Carry out pre-fumigation structural preparation, PPE selection, and site-security requirements.
- Calculate dosage, monitor gas concentration and the CT factor, and clear a structure for safe re-entry.
Complete the quiz to confirm your grasp of these objectives and earn your FDACS-13325 Record of Attendance.