
Lesson 1 established that IPM is a decision framework built on inspection, identification, thresholds, and targeted control. This lesson is where that framework hits the floor — literally. We are going to walk through structural IPM from the moment you park at a residential account to the moment you close out your service record. Everything in this lesson is field-applicable. Read it like a procedure, not a lecture.
Structural pest management is where Florida technicians spend the majority of their time. Roaches, rodents, ants, bed bugs, silverfish, stored product pests, occasional invaders — these are the accounts that come up every week, every route. Running them with IPM discipline is what separates a technician who builds a strong renewal book from one who generates callbacks and reschedules.
Inspect Before You Mix
This is the rule that separates IPM from spray-and-pray, and it is worth stating plainly: do not mix or load a product until you have completed your inspection and identified the pest problem you are treating. That sequence is not flexible. The inspection drives every product and placement decision you make. Reversing it — mix first, inspect after — is how technicians end up applying the wrong chemistry to the wrong location for the wrong pest.
Some technicians worry that this makes them look unprepared when they arrive without a pump sprayer already full. The opposite is true. A technician who shows up with a clipboard and a flashlight and asks thoughtful questions looks like a professional who takes the work seriously. A technician who mixes on the truck and walks in spraying baseboards looks like someone running a route, not managing a pest problem.
The Customer Interview
Before you touch anything inside the structure, spend two to three minutes with the customer or building contact. The information you get here frequently changes what you look for and where you look for it. Ask:
- Where have you been seeing pest activity, and when — daytime or nighttime?
- What specifically are you seeing — live pests, dead pests, droppings, damage?
- Has anything changed recently — a new appliance, a renovation, groceries from a different store, a new pet?
- Have you had any water issues — a leak, flooding, condensation you have noticed?
- Is anyone in the household sensitive to pesticides, pregnant, or undergoing chemotherapy?
That last question is not just courtesy — it is label compliance. Many products require specific precautions for sensitive populations, and the label requires you to know the occupancy situation before you apply. Document the answers briefly in your service notes.
The Systematic Inspection Sequence
Random inspections miss things. Systematic inspections do not. For a standard residential account, run the same sequence every time so that nothing gets skipped under time pressure. The sequence below moves from highest-probability harborage to lowest, following the logic that most structural infestations begin in the kitchen and expand outward.
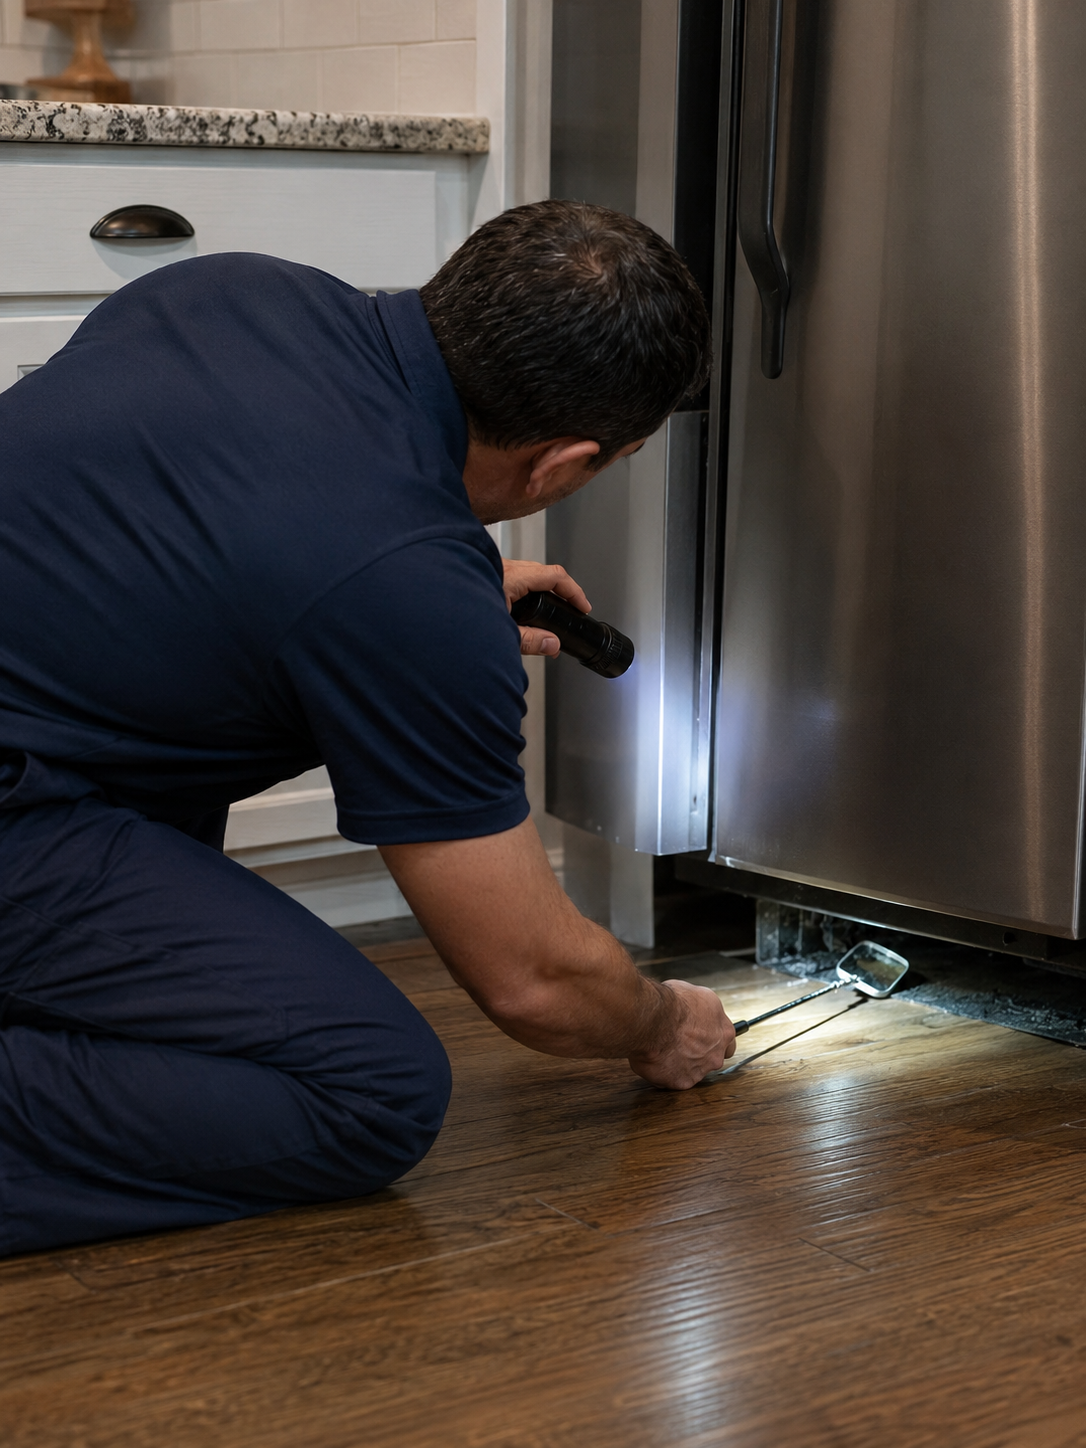
Zone 1: Kitchen
The kitchen is where the food, moisture, and heat sources concentrate — and therefore where most cockroach, ant, and stored product pest infestations begin. Inspect in this order:
- Refrigerator: Pull the unit away from the wall if accessible. Check the compressor compartment at the bottom rear, the condenser coils, and the motor housing. This is the single most common German cockroach harborage in residential kitchens. Look for fecal spotting on the floor under the unit and on the compressor itself.
- Stove and oven: Check the gap between the stove and adjacent counter surfaces. Open the broiler drawer and inspect the interior. Look at the base of the control panel. Check whether the stove can be slid out — if so, inspect the floor behind it.
- Dishwasher: Open the access panel at the base and check the motor compartment and the underside of the unit. The door gasket folds are also textbook harborage.
- Under sink: Check the entire cabinet interior — pipe penetrations where they enter the wall, the garbage disposal area, the trap for the drain. Note any moisture, staining, or soft cabinet material that indicates a slow leak.
- Cabinet hinges and crevices: Every cabinet. Cockroaches prefer tight spaces where they contact surfaces on multiple sides; hinges and the narrow gap between cabinet door and frame are perfect thigmotactic harborage.
- Pantry and dry storage: Open packages, look at the back of shelves, check the corners. Stored product pest damage — moths, beetles, weevils — starts in forgotten items at the back of the pantry, not the items you use every day.
Zone 2: Bathrooms
Bathrooms are secondary harborage for moisture-loving species — German cockroaches, silverfish, and drain flies in particular. Key inspection points:
- Under the sink cabinet: same inspection logic as kitchen, with attention to drain trap and supply line connections
- Behind the toilet base and the connection to the floor flange — moisture collects here from condensation and minor seepage
- Exhaust fan housing: German cockroaches exploit any warm space with accessible food debris, and bathroom fans accumulate enough lint and debris to support minor activity
- Tile grout cracks and caulking gaps — silverfish and cockroaches both use these as harborage and travel routes
Zone 3: Utility Areas
Laundry rooms, mechanical rooms, and utility closets are high-pressure zones for cockroaches and rodents. The water heater and washer/dryer combination creates warmth and condensation that makes these areas attractive year-round. Inspect the area around the base of the water heater, behind the washer and dryer, and at any pipe penetrations through the wall. Check whether there is a floor drain in the utility room — floor drains are a direct American cockroach entry route.
Zone 4: Garage
Garages in Florida are frequently infested with American cockroaches, Argentine ants, and rodents. Key inspection points: the door frame and weatherstripping (gaps under garage doors are common entry points), storage areas on ground level, especially cardboard boxes and natural fiber materials, the area around the garage door motor and any utilities mounted on the wall, and any pet food storage. Note whether the garage shares a wall with the kitchen — this is a common cockroach migration route.
Zone 5: Exterior Penetrations
Walk the exterior of the structure looking for points where pipes, cables, conduit, or HVAC lines enter the building. These are the entry points for American cockroaches, mice, and rats — and they are almost never addressed unless a technician specifically looks for them. Look for gaps around:
- Pipe chases where plumbing enters the slab or wall
- Electrical and cable conduit entry points
- HVAC line sets and condensate drain lines
- Weep holes in brick veneer (normal construction features that cockroaches exploit)
- Gaps at the foundation sill plate, especially in older construction
Document every open penetration you find. Some can be addressed immediately with copper mesh or appropriate caulk products. Others require follow-up by a contractor or the certified operator's direction.
Reading Pest Evidence
The pest itself is often the last thing you find. Evidence tells the story first — and learning to read it accurately is one of the highest-value skills you can develop as a structural technician.
Frass and Fecal Material
German cockroach frass is dark, granular, and resembles ground black pepper. You will find it concentrated near harborage — not spread evenly across a surface. A heavy deposit of frass in the corner of a cabinet hinge tells you that is an active harborage site right now. Light, scattered frass over a large area with no concentrated deposit often indicates activity that has spread through migration from a source you have not found yet. Large capsule-shaped droppings with ridged sides indicate American cockroaches. Smooth, tapered spindle-shaped droppings indicate rats. Tiny scattered rod-shaped droppings indicate mice. Mouse droppings are so small that they are often mistaken for roach frass — train yourself on the difference, because the treatment program is completely different.
Cast Skins
Cockroaches shed their exoskeleton as they grow — typically six to seven times between hatch and adulthood. Cast skins (also called exuviae) accumulate in harborage areas and indicate that insects are completing their life cycle in that location. Finding cast skins of multiple sizes tells you the population is well-established, has been present long enough to produce multiple generations, and is actively breeding at that site. Finding only adult-sized cast skins suggests a recent introduction that may not yet have started reproducing.
Grease Marks
Rodents follow the same runways repeatedly, rubbing the oils and dirt from their fur against surfaces they travel along. These grease marks — dark, greasy smudges along baseboards, joists, and pipe runs — are one of the most reliable indicators of an active rodent runway. Fresh grease marks are dark and slightly glossy. Old marks are dry and dusty. If you find grease marks, you have found where the rodent is traveling, which tells you exactly where to place traps or station devices.
Live vs. Dead Pest Activity
Dead insects near a baseboard are not necessarily evidence of current activity — they may be the result of a previous service. Live insects found during the day, especially cockroaches in open areas rather than harborage, indicate a high-pressure infestation. Cockroaches are nocturnal. Seeing them during a daytime inspection means the population has outgrown its harborage and individuals are being displaced into the open. Treat this as a red flag that requires a more thorough inspection, not just a routine bait application.
Odor Cues
A heavy German cockroach infestation produces a characteristic musty, oily odor — particularly noticeable when you open a cabinet or appliance that contains a large harborage. Rodent activity produces a sharp ammonia-like odor from urine. Some technicians can reliably detect these odors before they see any other evidence. Pay attention to what you smell when you open inspection areas. Your nose is a monitoring tool.
If you inspect a kitchen thoroughly and find zero evidence of pest activity — no frass, no live insects, no cast skins, no odor — the correct IPM action may be to document "no active infestation found" and not apply a pesticide. This is not a failure. This is exactly what IPM calls for. Applying chemistry to an account with no confirmed pest activity provides no benefit to the customer and adds unnecessary chemical exposure to the environment. Document your findings honestly and explain them to the customer.
Monitoring Tools: Sticky Traps as Data, Not Just Traps
A sticky trap placed in the right location and read correctly is one of the most useful monitoring tools in structural pest management. It tells you what is present, where it is active, and how much pressure exists. Used incorrectly — placed randomly, never read, never recorded — it is just a decoration.
Placement Strategy
Place sticky traps at the interface between harborage and foraging routes: inside cabinet corners near the back, along the base of appliances, along the wall-floor junction in utility areas, at known ant entry points. Avoid placing them in the open — pests use harborage edges and travel routes, not the middle of the floor. In a typical residential kitchen, two to three strategically placed traps give you far better monitoring data than ten traps placed at random.
Reading Trap Counts
When you retrieve a sticky trap, record what you find before you discard it: the species present, the approximate count, the life stages (nymphs, adults, or both), and whether any individuals are fresh or desiccated. Fresh captures indicate recent activity. Desiccated individuals may reflect historic activity, seasonal pressure, or prior service knockdown.
Trap counts only mean something when you know the context. Three German cockroaches on a trap in the kitchen after thirty days is a low-level indicator — worth a targeted bait application in the harborage zone and continued monitoring. Three German cockroaches on a trap in the garage of a house where you have never confirmed indoor German cockroach activity is a very different situation — likely an occasional wanderer from an outdoor introduction, possibly from adjacent landscaping or a neighbor's infestation, not an established breeding population indoors. Same count, completely different response.
Track counts over time on every account. A trend of increasing trap counts is more actionable information than any single service snapshot. If German cockroach captures in a kitchen have been 0, 0, 1, 2, 5 over five consecutive monthly services, that trend tells you a population is establishing. Address it at count 2, not count 5.
| Zone | Jan | Feb | Mar | Apr | May | Species |
|---|---|---|---|---|---|---|
| Kitchen — under sink | 0 | 0 | 1 | 2 | 5 | German roach |
| Kitchen — behind fridge | 0 | 1 | 3 | 4 | 8 | German roach |
| Bath — vanity base | 0 | 0 | 0 | 0 | 0 | — |
| Garage — perimeter | 2 | 1 | 2 | 1 | 3 | Amer. roach (occasional) |
Sanitation and Exclusion: First-Line IPM Tools
Sanitation and exclusion are not things you mention on the way out the door as an afterthought. They are IPM interventions that belong at the top of the control hierarchy, ahead of any chemical application. As a technician, your role in these areas is to identify the problem, make a clear recommendation, and document it. Depending on your company's protocols, some exclusion work may be within your scope; more extensive work may require certified operator direction or a separate service.
Sanitation Recommendations
Sanitation removes the food, water, and harborage resources that sustain pest populations. Without those resources, pest populations shrink even without chemical intervention — and with those resources in place, pest populations will rebuild after even the most effective chemical treatment. Key recommendations you might document for a residential customer:
- Store dry goods (grains, cereals, pet food) in sealed hard-sided containers rather than the original packaging
- Empty and clean the area under the kitchen sink regularly — clutter under the sink provides harborage
- Fix dripping faucets and address any plumbing leaks promptly — moisture is as important to cockroach populations as food
- Avoid leaving pet food and water bowls out overnight
- Reduce cardboard storage in garages and utility rooms — cardboard is both harborage and, for German cockroaches, a transport vector
Exclusion
Exclusion is the physical sealing of entry points to prevent pest access. It is the most durable long-term control for peridomestic pests — American cockroaches, mice, and rats entering from outside. Common technician-level exclusion materials include copper mesh (for rodent exclusion around pipe penetrations), steel wool backed by caulk, expanding foam for large voids (with the caveat that expanding foam alone is not rodent-proof — it must be paired with a harder material), door sweeps, and weatherstripping.
When you find a gap that you can address on-site, address it and document it. When you find a gap that requires structural work beyond your scope, photograph it, document it in your service record, note it in your customer communication, and flag it to the certified operator for follow-up. The account stays open until that gap is sealed — it is a known re-entry point and your records should reflect that.
Florida law requires that certain types of pest control work — including some structural modifications recommended as part of a pest management program — be authorized and supervised by the certified operator of record for the company. If you are unsure whether a specific exclusion recommendation is within your scope to execute on-site, ask before you act. Document what you found and what you recommended, and let the certified operator determine next steps. Your job is to find and report the problem — not to exceed your authority trying to solve it.
When to Apply Chemistry
After the inspection, after reading the evidence, after documenting your monitoring data — now you decide whether chemistry is called for. The answer is yes when: the inspection has confirmed an active infestation above threshold, passive and physical controls are insufficient on their own, and you have identified the pest precisely enough to select an appropriate product and application method.
Bait vs. Residual Spray
This is one of the most consequential product-selection decisions you make on a structural account, and getting it wrong actively worsens the infestation.
Gel bait is the primary chemistry for indoor cockroach management in IPM programs. It is applied as small placements (a pea-sized amount to a rice-grain amount, depending on the product and location) directly in or immediately adjacent to harborage. Cockroaches consume the bait, die, and through secondary transfer and necrophagy (roaches consuming dead roaches), the effect cascades through the population. Bait works because it delivers the active ingredient to the organism's digestive system via voluntary consumption — there is no repellency concern, no broad surface contamination, and no label-prohibited use-site issues that arise with sprays in sensitive locations like food contact surfaces.
Residual spray applies chemistry to a surface with the expectation that pests walking across the treated surface will receive a lethal contact dose. It is appropriate for perimeter applications, outdoor surfaces, crack-and-crevice treatments in non-food-handling areas, and certain structural pest scenarios. It is not appropriate in the same zone as gel bait — most residual insecticides are repellent to cockroaches, and applying a residual near bait placements will cause cockroaches to avoid the bait entirely. You will apply two products, pay for both, and achieve the benefit of neither.
The rule is straightforward: if you are using bait, do not apply repellent chemistry in the same treatment zone. Treat the bait zone with bait alone. If perimeter or residual treatment is also part of the service, keep those applications physically separated from your bait placements — different zones, different surfaces, different parts of the structure.
Spot Treatment Philosophy
Treat where the pests are. Not the whole room. Not the whole house. Where the pests are. The inspection told you where — that is why you did it. A spot treatment targeted to the confirmed harborage site at the correct label rate delivers a more effective lethal dose to the target population than a diluted broadcast application spread across every surface in the room. It also reduces total pesticide use, reduces environmental exposure, and reduces the risk of label non-compliance from applying products to sites not listed on the label.
Spot treatment requires confidence in your inspection — you have to actually know where the pests are before you can treat there specifically. That is the connection between inspection and application. An inspection that finds the harborage makes spot treatment possible. An inspection that just confirms "there are cockroaches somewhere in this kitchen" does not.
Customer Communication
Customers do not always understand why you are doing what you are doing. A customer who has been receiving monthly service where the technician walked in and sprayed for twenty minutes may be confused — or openly skeptical — when you arrive and spend eight minutes inspecting before you apply anything. Explain yourself before they have time to wonder.
A brief statement like this works: "Before I apply anything, I want to take a few minutes to check the areas where pests are most likely to be active. That way I know exactly what I'm dealing with and where to focus. It makes the treatment much more effective." That is all you need. Most customers appreciate it. Some will start showing you things they forgot to mention at the door — which often leads to exactly the inspection finding that changes the whole service.
When you make sanitation or exclusion recommendations, tie them directly to what you found: "I noticed the pipe gap under your kitchen sink goes through to the wall. That's one of the main ways cockroaches get in from outside — if we seal that, it really cuts down on what's coming in. I can flag that for my supervisor and we can get it addressed." Specific recommendations tied to specific observations are far more likely to be acted on than generic advice like "keep things clean."
When the inspection finds no active problem, say so clearly and positively. Customers worry that no treatment means no service. Reassure them that your monitoring is ongoing, that you are placing or checking traps, and that you will be back on schedule. No-treatment visits are not wasted visits — they are data points in your monitoring record.
Documentation: What to Record and Why
Your service record is the legal and operational backbone of the IPM program. What you document protects your company in a complaint or regulatory review, protects the customer by creating a history of the account's pest pressure and control measures, and protects you by demonstrating that you followed proper procedures.
At minimum, document the following on every structural service visit:
- Date, time, and account information
- Pest species observed and evidence found, by location
- Trap count data (species, count, location, trap number or designation)
- Any new conditions observed — moisture, structural changes, entry points identified
- Products applied: product name, EPA registration number, application site, target pest, rate applied, and method of application
- Sanitation or exclusion recommendations made to the customer
- Follow-up items flagged for the certified operator
- Your name and technician ID or license number
In a regulatory investigation or a customer liability dispute, your service records are your evidence. "I always check under the dishwasher" means nothing if your records never show it. "We recommended they fix the pipe gap six months ago" means nothing if there is no documentation of that recommendation. Write down what you found, what you did, and what you told the customer. Every visit, without exception. This is not extra paperwork — it is how professional pest management is practiced.
Putting It Together: One Service Call
Here is what IPM structural pest management looks like as a continuous loop on a single residential account:
- Arrive. Brief customer interview — any changes, any new activity?
- Retrieve and read sticky traps from previous visit. Record counts by location.
- Inspect systematically: kitchen → bathrooms → utility → garage → exterior.
- Apply threshold thinking: is what you found above the level that calls for action?
- If yes: select the appropriate tool (bait, exclusion, residual, mechanical trap) for the confirmed pest at the confirmed location.
- Apply chemistry only at harborage and activity sites. Keep bait zones and residual zones separated.
- Place fresh monitoring traps.
- Communicate findings and recommendations to the customer.
- Document everything.
That sequence takes discipline under time pressure. Routes are full, customers sometimes want to talk, and it is always faster to skip the inspection and go straight to the sprayer. But the technician who runs that sequence consistently, on every account, is the one whose accounts stay clean between services, whose customers renew, and whose callbacks are a fraction of the industry average. The time the inspection takes is paid back tenfold by not running a re-treatment three weeks later.
Lesson 3 takes this same decision-making discipline outside — into turf, ornamental plantings, and the very different pest pressures that Florida's outdoor environments create. The framework is the same. The specific tools, pests, and thresholds are different. We will also cover scouting techniques, plant disease identification, and how weed management fits into the IPM picture for turf and ornamental accounts.